Network switches come in two different flavors: managed, where you have some interface to configure and monitor the equipment, and unmanaged where the device just does what it is supposed to do and you can’t really control it. [Tiziano Bacocco] wanted to manage his cheap unmanaged switch, so he did what any good hacker would do: he opened it up.
Inside the Digicom 10/100 switch he found an IP178CH controller IC and a quick search turned up a data sheet. [Tiziano] noticed there were three ways to configure the switch: Some hardware pins could control very basic functions; an EEPROM (absent on the PCB) could configure the device; or the chip would accept commands via a synchronous serial port.
Since the datasheet covered the protocol required, [Tiziano] commandeered an Arduino Pro Mini and used it to send commands to configure the switch. A few resistors and some quick code allowed him to control VLAN and other functions on the switch via the USB port. Of course, he mentioned you could use a Raspberry Pi if you wanted a network interface–or maybe that’s a good excuse to use one of those Ethernet shields you got on clearance at Radio Shack.
If you aren’t clear on why you care about a managed switch, see the video below. Of course, your switch might not use an IP178CH, but we’ve covered a similar hack for a TL-SG1005D chip before, too.
Today when you think of Ethernet, you probably think of CAT-5 cable or something similar. But it hasn’t always been like that. In the early days of Ethernet networking, an Ethernet cable was a big piece of coax. A media attachment unit (MAU) clamped to the cable and then connected to an attachment unit interface (AUI) that resided in the actual network card. Later standards used thinner coax that attached to the card using a Tee connector, but even these are rare today.
However, there has been a significant demand over time for compatibility between new network gear and old network gear. That means you can find inexpensive surplus MAUs that convert from AUI to modern network cable in the usual places you find surplus (like eBay, for example). These cheap adapters have a network link light on them and all the logic required to drive it.
All you need is a 12V source. [TanzerGuy] had seen an earlier project that used an MAU in a plastic case and did some serious surgery on it that involved drilling and soldering. His MAU had a metal case, so he opted to get a DA-15 connector that fits an AUI connector (despite having 15 pins, these aren’t the same as a VGA connector, which is a DE-15; both are often erroneously called DB-15s). A 12V battery and clip soldered to the DA-15 socket allow [TanzerGuy] to plug a cable into the MAU and determine if the cable is live or not. Including the batteries, he spent less than $20.
If you are interested in learning more about old style Ethernet, [MattMillman] did a 10Base5 project “just because.” Of course, you could carry around a little travel router (or a dedicated tester) to test cables, but what fun is that? If you think CAT5 or CAT6 cable is as good as coax, you might need to consider the application.
[Alex@Raspi.tv] had the misfortune of blowing the USB hub and Ethernet port on a Raspberry Pi B+. He thought about using a cheap SPI to Ethernet board to rescue it, and while he bought the board, he never got around to interfacing it to the broken Pi. However, when he saw the Raspberry Pi Zero arrive and noticed that everyone wanted to connect it to the network, he remembered the SPI board, rescued it from his junk box, and a few hours later had Ethernet via Raspberry Pi GPIO working.
To make things easier, he got it all working on a Pi A first and then moved to the Zero. You’d think performance would not be very good, but measurements [Alex] made show it isn’t bad at all, considering:
Pi Zero at 12 MHz 3.33 Mbaud down, 2.82 Mbaud up, 39.956 ms latency, 52.19km
Pi Zero at 16 MHz 3.67 Mbaud down, 2.90 Mbaud up, 37.749 ms latency, 43.57km
Pi Zero at 20 MHz 3.88 Mbaud down, 3.10 Mbaud up, 42.474 ms latency, 43.57km
[Alex] notes that the Pi’s official 3.3V rail capacity doesn’t meet the requirements of the SPI Ethernet module he used. However, he also says it works, and he’s heard “unofficially” that it probably should work. We were not sure if he meant he heard the Pi’s 3.3V supply is underrated or if the consumption of the Ethernet chip is overstated.
We’ve seen a lot of Pi Zero hacks in the last week or two. The WiFi hack is similar, and there was an audio hack, too. Of course, there’s also the lively debate about if you should try to extend a Zero anyway.
PCBs can be art – we’ve known this for a while, but we’re still constantly impressed with what people can do with layers of copper, fiberglass, soldermask, and silkscreen. [Sandy Noble] is taking this idea one step further. He took C64, Spectrum, and Sinclair PCBs and turned them into art. The results are incredible. These PCBs were reverse engineered, traced, and eventually turned into massive screen prints. They look awesome, and they’re available on Etsy.
$100k to bring down drones. That’s the tagline of the MITRE Challenge, although it’s really being sold as, “safe interdiction of small UAS that pose a safety or security threat in urban areas”. You can buy a slingshot for $20…
[styropyro] mas made a name for himself on Youtube for playing with very dangerous lasers and not burning his parent’s house down. Star Wars is out, and that means it’s time to build a handheld 7W laser. It’s powered by two 18650 cells, and is responsible for more than a few scorch marks on the walls of [styropyro]’s garage.
Everybody is trying to figure out how to put Ethernet and a USB hub on the Pi Zero. This means a lot of people will be launching crowdfunding campaigns for Pi Zero add-on boards that add Ethernet and USB. The first one we’ve seen is the Cube Infinity. Here’s the thing, though: they’re using through-hole parts for their board, which means this won’t connect directly to the D+ and D- USB signals on the Pi Zero. They do have a power/battery board that may be a little more useful, but I can’t figure out how they’re doing the USB.
It’s time to start a tradition. In the last links post of last year, we took a look at the number of views from North Korea in 2014. Fifty-four views, and we deeply appreciate all our readers in Best Korea. This year? For 2015, we’ve logged a total of thirty-six views from the Democratic People’s Republic of Korea. That’s a precipitous drop that deserves an investigation. Pyongyang meetup anyone?
When [iliasam] needed an Ethernet connection, he decided to see how much of the network interface he could put in the FPGA logic. Turns out that for 10 Base-T, he managed to get quite a bit inside the FPGA. His original post is in Russian, but automatic translation makes a passable attempt at converting to English.
This is a classic trade off all FPGA designers face: how much external logic do you use for a particular design. For example, do you add memory to the PCB, or use FPGA resources as memory? Each has its advantages and disadvantages (that’s why it is a trade off). However, if you are trying to keep things cheap, slashing external circuitry is often the way to go.
The only thing between the Ethernet cable and the Altera FPGA (with some Verilog inside) is a pair of transformers and a couple of resistors. The Verilog handles all the encoding and decoding. We aren’t sure if it is the translation or just an idiom in Russian, but the post describes this as a “software” implementation, but–as we’ve pointed out before–Verilog on an FPGA doesn’t constitute software in the strictest sense. It describes logic gates that form hardware designs.
This isn’t the first time we’ve seen an FPGA pushed to avoid external devices. Even if it isn’t the right trade for your project, it is useful to have it in your bag of tricks. If you were seriously thinking of trying this, you might mine Opencores to see if any of the Ethernet PHY projects they list are useful to you, as well.
Vivado is Xilinx’s software for configuring the Zynq (among other chips), and the tutorial shows you how to use it. The Ethernet PHY is an FPGA Mezzanine Card (FMC) with four ports that is commercially available. The project uses VHDL, but there is no VHDL coding involved, just the use of canned components.
The real issue when using an FPGA and a CPU is the interface between the processor and the FPGA circuitry. In this case, the ARM standard AXI bus does this task, and the Ethernet component properly interfaces to that bus. The IP application in the second part of the post is an echo server.
We’ve seen the Zynq used in flying machines and also in a music synthesizer. Although this project doesn’t use any Verilog or VHDL that you create, it is still a great example of configuring using Vivado and using common components in a design.
The venerable ESP8266 has rocked the Internet of Things world. Originally little more than a curious $3 WiFi-to-serial bridge, bit by bit, the true power of the ESP has become known, fully programmable, with a treasure trove of peripherals it seemed that the list of things the ESP couldn’t do was short. On that list, at least until today was Ethernet.
No, despite the misleading title, the ESP does not have a MAC and/or PHY, but what it does have is an incredible 80 MHz DMA-able shift register which can be used to communicate 10BASE-T Ethernet using a new project, espthernet. Join me after the break for video proof, and a deep dive into how this is possible.
Why Does the ESP8266 Need Ethernet?
The ESP8266 has all sorts of communication and peripherals, but one interface I found that I wanted was Ethernet. I wanted some way to do bizarre things with the ESP’s wireless that would disrupt its connection with the host AP, since it supports promiscuous and mesh modes. I started out and tried to see where I would end up.. Every step of the way I had no idea if this would work at all. I couldn’t find anyone who is using the I2S interface in duplex. No one knew how fast it could go. No one knew if it would mangle data. What would the performance be like? Was it possible to send/receive 1.5kB frames? Over the course of several months, the answers to all of these questions panned out much better than I had expected!
DISCLAIMER: This project does not comply explicitly to the IEEE 802.3 standard. It will not work as well as properly engineered devices. Don’t get confused. This is a party trick, not a legitimate engineering solution.
10BASE-T uses differential signalling, NLPs to announce link presence, preambles, Manchester encoding for the bits, CRC32s for the FCS, various protocol checksums and bursts of data at up to ten megabits. It’s no wonder engineers use dedicated hardware. Some of the better known Ethernet controllers used by hobbyists are the ENC28J60 or its big, 100BASE-T brother, the ENC424J600 but one thing’s for sure: with the exception of some novelty projects, like simplex on an ATMega168 or half-duplex ATTiny85, people use purpose-built Ethernet hardware.
The ESP’s I2S bus is home to a variety of projects including an MP3 player, WS2812 controller, CNC driver, and Color NTSC broadcaster. By operating the I2S bus in the ESP8266 at 40 MHz, we can capture everything that happens on wire and shift it into 32-bit words. In software, we can look at what was received, one 32-bit-word at a time; decoding packets as they roll in. Between the DMA engine attached to the I2S bus, and the 160 MHz 32-bit Xtensa core, several of the layers of decoding can be done on-the-fly and, in software.
There’s still the little problem of electrical compatibility. Though the ESP can send and receive frames with a resistor and two capacitors, it’s best to use an actual line driver, such as the $1.50 ISL3177 since it is much more sensitive, powerful, has better protection and slew rate limiting. The error rate goes from ~5-10% to <0.1%. It’s still in violation of the IEEE802.3 standard, just not as badly.
Ethernet Frames
Ethernet frames are what hold packets. The frames exist to transport packets over the dark and dangerous physical layer. They contain a preamble, the MAC addresses of the receiver and sender and the actual packet. The packet is what contains things like TCP, UDP, etc. It also contains an FCS at the end to make sure the packet didn’t get corrupted in flight.
These frames are not just sent out on-wire as a serial stream. 10BASE-T Ethernet transmits differential signals over copper wires, with magnetic isolation. The combination of these things means we can’t send too many 1’s or 0’s in a row without wrecking up the magnetics.
Though there are many techniques used such as 4B5B (On 100BASE-T Ethernet) or EFM (on CDs) to solve this in other communications technologies, 10BASE-T chose Manchester encoding.
Manchester encoding describes all 1’s and 0’s in terms of upward or downward transitions. A “1” bit is represented by a low to high transition, while a 0 is represented by a high-to-low transition. These transitions must be kept carefully in sync, otherwise, there would be a trainwreck of confusion. If the wrong transitions are checked it’s easy to get the bits backwards and lose data.
As a software engineer, I originally found it mind-boggling why someone would use such a sensitive coding scheme. The answer lies in the hardware. It is possible to use a PLL to sync up to the stream in the preamble. Once locked, it finds the end of the preamble and it gets a clear stream of the data. For us, however, we will have to do the decode in software and with this approach, it will be evident that Manchester is less than convenient.
The System
The goal is to send and receive Ethernet frames. There are several steps that need to be taken in order to do this. While the I2S DMA engine provides us raw 32-bit values of the bits on the wire, we still need to find the frames, decode the frames, check the FCS and pass the frames off to the user. If we were to move the Manchester decoding into the main thread, it would take a staggering 6208 bytes per buffered packet! We need to do the decoding inside the I2S interrupt.
Once passed off to the main thread, it can check FCS and whatever else is needed at the user layer. The FCS is critical in this application, since, any number of things can cause our packet to become corrupt. Normal systems only need to contend with electrical noise, while we need to worry about interrupts taking too long, buffer overflows, and anything else that could corrupt our packet.
If the user layer wants to respond or send any packets back, it can frame up the message, put on the CRC, encode the packet and pass it back to the interrupt, which will take and transmit the packet at the next available opportunity.
The Decode
So, now, the ESP is perpetually capturing this stream of 1’s and 0’s. Once a new chunk of data comes in, an interrupt is called and our code can begin to search for a packet in the data. To check if there is a packet present, it simply has to search the stream for 32-bit words that aren’t all 1’s or 0’s. Once we find 3 frames in a row with something going on, our confidence that we have a packet is high.
Manchester decoding is a little trickier from software land. Because we have a digitized signal, it’s not always perfectly in lock-step with the signal. To make matters more frustrating, if we are sampling at exactly 40 MHz, and there is an equal chance of a high verses low signal, there can be ambiguous cases. To solve this, we must add a bias so we see more 0’s than 1’s. There’s a lot that goes into interpreting each bit. Long and short detection, finding error states, finding end of the preamble, interpreting bit states. This was complicated, so an HTML5 GUI was made. It’s available on the web here which allows you to play with a sample packet, flip bits, etc. When running on the ESP, it can be used to capture problematic packets and examine the raw bits.
Because the bits are coming in at 40 MHz, that gives us 4 processor clock cycles (@160 MHz) per bit, at most to figure out what to do with our input stream. The naive algorithm is 140 lines of code and processes one bit at a time, and after heavy optimization takes about 10 times too long to run in the interrupt handler.
In order to achieve the speed-up needed to run in the interrupt, we use a table. For each possible combination of input states and input bits, we compute the output states. We have to worry about polarity, whether the last bit before the nibble was a 1 or a 0, the number of bits that have been the same in a row, check for unmatched short pairs, and 4 bits of new data. We also have 10 bits of output data. This works out to a 1024×2-byte table.
The results are staggering. By going nibble-at-a-time and using a table instead of code, we received the 10x performance boost we needed and some change!
The “user” layer
Because it is not yet possible to use the TCP/IP stack that comes with the ESP, we needed to use our own. Since I modelled this Ethernet stack off of the ENC424J600 driver, it was very easy to port the avrcraft IP+ARP+UDP+TCP stack to this project. To make things more convenient, the HTTP server used in this project was borrowed from there, too! So porting even the web server to our TCP/IP stack was trivial.
Encoding
Ethernet isn’t very interesting if all you can do is receive. Transmitting packets is needed, too. The IP stack will be able to build a frame with the MAC addresses and payload, but we’ll have to add the preamble and FCS, then manchester encode the data. Manchester encoding a signal could be painful, if one were to output one bit at a time, but we can leverage a table here as well! Encoding the data on wire can be done byte-at-a-time using the function below.
The ESP’s I2S engine cannot receive packets unless the transmitter is also running. That means that even if we’re only transmitting 0’s, we still have to feed the DMA engine valid descriptors. The descriptors link to a “next” which is streamed out after the link it’s on. There isn’t a way of changing the active DMA once it’s started. Additionally, stopping the DMA subsystem on the TX side, even briefly will cause the I2S bus to lock up.
There’s no way of emitting just a packet here and there. To make matters worse, interrupt calls can be missed, so they can’t be relied on switching chains immediately. All of the states must be stable. We have several descriptors that just send 0’s ([0] through [3]) and a the possibility of linking in one or more data descriptors. In order to send only one packet, we have to transition between pinging from [0] and [1] to sending the packet, to pinging between [2] and [3].
What this means is:
Normally, [0] must point to [1] and [1] to [0].
When sending a packet, [1] points to [Packet], [Packet] points to [3]
The system will stay bouncing between [3] and [2] until…
You clear it out by hooking [1] to [0] and [3] to [0]
Then, the system will go back to idling between [0] and [1].
Voilà! We can now receive and send packets on 10BASE-T Ethernet!
Where to from here?
There are still many potential improvements, lots of maintenance, algorithm improvement, great room for development and integration with the existing (or new TCP/IP stacks) and much more. Maybe this could even be ported to an Ethernetless ARM? None of that is critical, though. With Ethernet unlocked, it frees up the WiFi interface to do all sorts of unusual things. Now, it is possible to monitor for packets from all sorts of sources, inject packets. Groups of ESPs in mesh mode could be bridged to Ethernet. ESPs in monitor mode can communicate their findings back, or even inject packets remotely. But I’m looking forward to seeing the projects you will create that couldn’t have even imagined!
The ever popular ESP8266 is popping up in more and more projects. There are CNC controllers, blinkey WiFi lighting, and downright bizarre WiFi to Ethernet bridges. [Cicero] has thrown his hat into the ring with one of these Ethernet-enabled ESP8266 builds, and right now everything works, it’s simple to put together, and cheap to build.
Astute readers will notice we’ve seen something like this before. A few months ago, [cnlohr] discovered the Ethernet controller in the ESP8266. This was, by every account, the hard way of doing things. [cnlohr] was driving the Ethernet directly through the ESP’s I2S bus. [Cicero]’s project does not. It uses the cheap ENC28J60 SPI to Ethernet adapter to put the ESP on a wired network. Is one solution better than the other? That’s arguable. Is one solution much simpler than the other? Yes, [Cicero]’s work allows anyone to add Ethernet to the ESP8266 with a few resistors and a module that costs $3 from the usual online shops.
Although this build is not as technically amazeballs as [cnlohr]’s work with driving Ethernet directly from the ESP, it is very easy to implement, opening up the doors to a few of the more interesting capabilities of a wired ESP. With the Ethernet unlocked, there’s a free WiFi interface to wardrive, snoop around in promiscuous mode, inject packets, bridge a bunch of ESPs in mesh mode to another network, and other network shenanigans. The ENC28J60 modules have probably already found their way into a few parts bins and junk boxes already, making [Cicero]’s work the quick start guide to wired networking on the ESP.
[gw0udm] had an ancient monitored alarm system fitted to their home, and decided it was time to upgrade to something a little more modern. They chose a system from Texecom, but when it came time to hook it up to their computer, they were alarmed at the costs – £40 for what amounted to a USB-to-Serial cable! There were other overpriced modules too. But [gw0udm] wanted to upgrade, so it was time to hack the system.
The first step was grabbing a £4 USB-to-Serial board and wiring it up – a simple job for the skilled hacker. As we always say – everything speaks serial. [gw0udm] then set their sights higher – they wanted the Ethernet interface but weren’t about to cough up the coin. After some research, it was determined that a Raspberry Pi could be used with a utility called ser2net with the existing serial interface to do pretty much the same job. It was a simple matter of figuring out the parity and messaging format to get things up and running.
From there, the project moves on to tackling the creation of a GSM module for monitoring in the absence of a local network, and on flashing the firmware of the system itself. It’s great to see a project continually grow and expand the functionality of a product over time.
The ESP32 is the latest and greatest wonderchip from Espressif. It’s a 32-bit, dual-core chip with WiFi, Bluetooth, and tons of peripherals such as CAN and Ethernet. For most of these peripherals, Espressif already has a few bits of example code, but [Frank Sautter] didn’t like the Ethernet implementation. The ‘stock’ code calls for a TLK110 Ethernet PHY, but that’s an expensive chip when bought in quantity one. A better chip would be the LAN8720, so [Frank] built a board to enable Ethernet on the ESP32 with this chip.
The ESP32 only needs a few components to wire it into an Ethernet network. Just a few resistors, capacitors, and an RJ45 jack will take care of most of the work, but because he’s taking the Ethernet ‘shield’ route, he needs to add his own Ethernet PHY. The Waveshare LAN8720 is the chip for this, but there’s an issue with the pin configuration of the ESP32. GPIO0 on the ESP32 has two functions — the first is pulling it low during startup for serial programming, and the second is the clock input for the EMAC function block. Some bit of circuitry must be devised to allow for both conditions to enable Ethernet on the ESP32.
[Frank]’s solution is to add a few pull-up and pull-down resistors to a breakout board, and use an unused GPIO pin to switch GPIO0 high during startup, but allows a crystal to grab it a bit later. It’s a hack, certainly, but it does allow for some much cheaper chips to be used to give the ESP32 Ethernet.
Most of us have Ethernet in our homes today. The real backbones of the Internet though, use no wires at all. Optical fibers carry pulses of light across the land, under the sea, and if you’re lucky, right to your door. [Sven Brauch] decided to create an optical link. He didn’t have any fiber handy, but air will carry laser pulses over short distances quite nicely. The idea of this project is to directly convert ethernet signals to light pulses. For simplicity’s sake, [Sven] limited the bandwidth to one channel, full-duplex, at 10 Megabits per second (Mbps).
The transmit side of the circuit is rather simple. An op-amp circuit acts as a constant current source, biasing the laser diode. The transmit signal from an Ethernet cable is then added in as modulation. This ensures the laser glows brightly for a 1 bit but never shuts completely off for a 0 bit.
The receive side of the circuit starts with a photodiode. The diode is biased up around 35 V, and a transimpedance amplifier (a current to voltage converter) is used to determine if the diode is seeing a 1 or a 0 from the laser. A bit more signal conditioning ensures the output will be a proper differential Ethernet signal.
[Sven] built two identical boards – each with a transmitter and receiver. He tested the circuit by pointing it at a mirror. His Linux box immediately established a link and was reported that there was a duplicate IP address on the network. This was exactly what [Sven] expected. The computer was confused by its own reflection – but the laser and photodiode circuits were working.
Finally, [Sven] connected his PC and a Raspberry Pi to the two circuits. After carefully aligning the lasers on a wooden board, the two machines established a link. Success! (But be aware that a longer distances, more sophisticated alignment mechanisms may be in order.)
Prolific hacker [kodera2t] is working on his own “ESP32 monster board” dev board for the still-newish ESP32 WiFi module. His board has everything: Ethernet, OLED, LiPo, and even CAN-bus. But all that peripheral connectivity is worth nothing if you can’t program the microcontroller to use it.
The Arduino environment for the ESP32 is coming along quite nicely, but it’s not yet fully featured enough to run all of [kodera2t]’s hardware. To take advantage of all that, he needs to use Espressif’s SDK — called the “IoT Development Framework” or IDF for short. In his latest project log, [kodera2t] goes through everything necessary to get the IDF up and compiling on OSX. (It’s strangely similar to the Linux procedure.) Read through the official instructions here, if you want more, but we think [kodera2t] hits all the high points.
Retrocomputers are fun, but ultimately limited in capability compared to modern hardware. One popular pursuit to rectify this is the connection of early home computers to the Internet. To that end, [que] built the Retromodem for the Commodore 64.
The build starts with a case from an Intel 14.4 modem. A little fast for the Commodore 64 era, but anachronism is charming when done tastefully. Inside is an Arduino with an ethernet module to handle the heavy lifting of carrying packets to the outside world. [que] took the time to wire up status LEDs for the proper vintage look, which really adds something to the project. They switch on and off to indicate the various settings on the modem – it’s great to see in the video below the break the “HS” LED light up when the baud rate is changed to a higher speed.
The project implements most of the Hayes command set, so you can interface with it over a serial terminal just like it’s 1983. [que] doesn’t go into too many details of how it’s all put together, but for the experienced code warrior it’s a project that could be whipped up in a weekend or two. For a more modern take, perhaps you’d like to hook your C64 up over Wifi instead?
Have you ever torn open an Ethernet jack? We’d bet the vast majority of readers — even the ones elbow-deep into the hardware world — will answer no. So we applaud the effort in this one, but the conclusion landed way off the mark.
In the last few days, a Tweet showing a Raspberry Pi with its Ethernet socket broken open suggested the little PCB inside it is a hidden bug. With more going on inside than one might expect, the conclusion of the person doing the teardown was that the Raspberry Pi foundation are spying upon us through our Ethernet traffic. That’s just not the case. But we’re still excited about what was found.
The truth is rather more obvious to anyone who has spent a lot of time working with Ethernet interfaces. To confirm our suspicions we had a chat with Roger Thornton, the Principal Hardware Engineer at Raspberry Pi Trading, and the man with his finger on the pulse of what goes into a Pi. He was very happy to confirm in a fascinating conversation about sourcing Ethernet jacks with integrated magnetics, that of course the Pi contains no surveillance hardware. Instead what our Tweeter had found are the magnetics, the isolation transformer, and some filter components included because the latest Raspberry Pi version (Raspberry Pi 3 Model B+) has support for a future Power Over Ethernet (PoE) add-on.
It is these filter parts on their little PCB that seem to have captured attention as possible nefarious parts, but in debunking the whole idea it’s worth taking a look at the magnetics themselves because they are an interesting and above all inexpensive part that has some uses outside the world of Ethernet.
What Goes Into an Ethernet Jack Anyway?
The schematic of the Raspberry Pi 3 B+ ethernet magnetics.
[Roger] was kind enough to give us the schematic of the jack used in the Pi, though it is typical of such jacks and bears very little difference from that you’d find in any number of other nearly identical components. At its centre are a row of four transformers, which serve to isolate the Pi from whatever stray voltages may be present upon the Ethernet cabling. To the left of each transformer is a trifilar choke to cancel out any common-mode noise that may have arrived via the cable. At the bottom is a set of RC filters on the PoE power lines which were probably the components that ignited the controversy.
The transformers have a bandwidth from about 250 kHz to 100 MHz which allows them to ignore the low frequency 48 VAC of the PoE, and pass through the Ethernet signals. In the case of the Pi 3 B+, the PoE lines are taken to a header on the board, which will mate with an upcoming PoE HAT that will contain a switching PSU with its own 1.5 kV isolation transformer to preserve the barrier between the Pi and the line.
An interesting aside to the conversation came in that some companies wind their own transformers while others buy ready-made ones. An easy way to spot the in-house ones it seems is that they will usually be concealed under some black sealant as is the case with the one in the Tweet, while the bought-in ones will be standalone potted components.
Hacking Ethernet Components
A row of Ethernet transformers in what looks like a switch. By Hans Haase [CC BY-SA 4.0].So with [Roger]’s help we’ve established that the Pi contains no nefarious components (which of course we knew anyway). But there remains the discovery that every Ethernet card ever made has at least one transformer with a very usable RF bandwidth, so these are components very much worth a second look if you have an interest in radio. If you have ever needed a small RF transformer for inter-stage coupling you will be aware that these are not cheap components, so the thought that there is a ready supply that you can either lift from an old Ethernet-connected device (or buy for only a bit more than pennies) is of great interest.
Ethernet transformers are available in a range of packages, from those built-in to sockets like the one on the Pi through various surface-mount packages and even through-hole versions on older devices. They come in three main categories which as you might expect correspond to the different Ethernet standards. 10 Mbit components usually have two transformers in one package and a bandwidth from about 100 kHz to 10 MHz, 100 Mbit ones have two with a 300 kHz to 100 MHz bandwidth, and 1000 Mbit ones like the Pi component described above have four 300 kHz to 100 MHz transformers. The transformers themselves are wound onto tiny ferrite rings, and are almost always 1:1 centre-tapped with a 600 Ω impedance and a common-mode choke on one side as described above.
An Ethernet transformer providing a balanced mixer input to a home-built HF receiver.
Within those limitations they can be used for a variety of small-signal RF tasks that can work within those impedance ranges. By using only one half of the winding that doesn’t have the common-mode choke they can be configured as a 1:2 transformer with a 300 Ω input and a 600 Ω output, for example. In bandwidth terms they also have useful performance some way beyond their advertised specification, for example here in Europe they will pass through long wave broadcast stations at around 150 kHz to 200 kHz, and at the other end of their range they will pass through FM broadcast stations at 108 MHz. Within that range you have the entirety of HF and the lower end of VHF, allowing for example the use within every amateur band from the MF bands to 6 m and 4 m if your country has an allocation. Where this is being written they are the go-to transformer in homebrew receivers and small-signal stages for example, where they are infinitely preferable to winding a toroid.
Sometimes it is easy to believe that an application-specific component such as an Ethernet transformer could have no other uses, but it’s worth reading data sheets and asking the question as to whether any useful components lurk unnoticed in your junk bin. Take a second look, you’d be surprised what you might find!
Since its introduction years ago, the ESP-8266 has taken over the world. It’s the chip inside thousands of different projects, and the basis for dozens of different IoT thingamadoos. The follow-up to the 8266, the ESP-32, is even more capable. It has a ton of peripherals inside, including an Ethernet MAC. What’s that? Yes, it’s possible to put Ethernet on an ESP-32, and give an IoT board PoE. That’s what [Patrick] is doing for his Hackaday Prize project, and it’s an awesome idea.
This build began as you would expect, with an ESP-32 module attached to one side of a board with some breakouts for the GPIOs and a USB to Serial chip. The tricky part here is the PoE part of the Ethernet, which requires MagJack Ethernet connectors, a flyback transformer, and a PoE-PD controller. These were expensive parts, and the design of such a board requires some thinking — you need isolation across the transformer, and proper ground planes for this mess.
There’s something slightly brilliant about using an ESP-32 in a wired configuration. Far too often, we see these modules used as wireless nodes in a sensor net. The battery consumption is significant, and all those makers are adding USB power input to their fancy WiFi sensor nets. If you’re running wires for power anyway, why not add Ethernet and do away with all that mucking around with WiFi setup. It’s a great project, and one of the better entries in this year’s Hackaday Prize.
There’s a school of thought that says that to fully understand something, you need to build it yourself. OK, we’re not sure it’s really a school of thought, but that describes a heck of a lot of projects around these parts.
[Tim] aka [mitxela] wrote kiloboot partly because he wanted an Ethernet-capable Trivial File Transfer Protocol (TFTP) bootloader for an ATMega-powered project, and partly because he wanted to understand the Internet. See, if you’re writing a bootloader, you’ve got a limited amount of space and no device drivers or libraries of any kind to fall back on, so you’re going to learn your topic of choice the hard way.
[Tim]’s writeup of the odyssey of cramming so much into 1,000 bytes of code is fantastic. While explaining the Internet takes significantly more space than the Ethernet-capable bootloader itself, we’d wager that you’ll enjoy the compressed overview of UDP, IP, TFTP, and AVR bootloader wizardry as much as we did. And yes, at the end of the day, you’ve also got an Internet-flashable Arduino, which is just what the doctor ordered if you’re building a simple wired IoT device and you get tired of running down to the basement to upload new firmware.
Oh, and in case you hadn’t noticed, cramming an Ethernet bootloader into 1 kB is amazing.
Speaking of bootloaders, if you’re building an I2C slave device out of an ATtiny85¸ you’ll want to check out this bootloader that runs on the tiny chip.
The Macintosh SE/30 is the greatest computer ever made, and I’m not saying that just because I’m sitting on a cache of them, slowly selling them to computer collectors around the world. No, the SE/30 is so great because of how powerful it is, and how much it can be expanded. A case in point: here’s an SE/30 that’s a Spotify player. Oh, it does it over WiFi, too.
You might be asking yourself how a computer from 1989 (it’s late enough in the year that we can safely say this computer is thirty years old) can possibly play music over the Internet. While the SE/30 supported an astonishing 128 Megabytes of RAM, it’s still just a bit too slow to play MP3s or any modern audio codec. The 68030 CPU just wasn’t fast enough to play audio, to say nothing of streaming it over a network connection. The trick is that this SE/30 is simply a remote for Spotify Connect. You could theoretically get the Mac to speak, “Alexa, play Despacito” and get the same functionality, but that’s not fun, is it? You need to do it wirelessly.
This is a continuation of one of [ants] earlier hacks that basically put a WiFi to Ethernet bridge inside an SE/30. Tie that together with a Finder extension and you have System 7, with WiFi. That’s a connection to the Internet, but [ants] actual wrote an app to connect to a Spotify playlist, browse tracks, and display album art in beautiful 1-bit color. Writing the app involved dealing with OAuth, which means the MacPlayer isn’t entirely standalone; some of it must be done on a ‘modern’ device. This, along with porting a conversion utility that translates UTF-8 text encoding into something the Mac can understand ties everything together.
With all those pieces, the SE/30 becomes a handsome, functional piece of art. Apple is never going to release a computer like this again, and you’re not going to find a touchbar MacBook being used like this in thirty years time.
At this point, you’ve almost certainly heard about the Atomic Pi. The diminutive board that once served as the guts of a failed robot now lives on as a powerful x86 SBC available at a fire sale price. How long you’ll be able to buy them and what happens when the initial stock runs out is another story entirely, but there’s no denying that folks are already out there doing interesting things with them.
One of them is [Jason Gin], who recently completed an epic quest to add a PCI Express (PCI-E) slot to his Atomic Pi. Things didn’t exactly go according to plan and the story arguably has more lows than highs, but in the end he emerged victorious. He doesn’t necessarily recommend you try the same modification on your own Atomic Pi, but he does think this sets the stage for the development of a more refined upgrade down the line.
[Jason] explains that the board’s Ethernet controller was already communicating with the Intel Atom x5-Z8350 SoC over PCI-E, so there was never a question about whether or not the modification was possible. In theory, all you needed to do was disable the Ethernet controller and tack on an external PCI-E socket so you could plug in whatever you want. The trick is pulling off the extremely fine-pitch soldering such a modification required, especially considering how picky the PCI Express standard is.
In practice, it took several attempts with different types of wire before [Jason] was able to get the Atomic Pi to actually recognize something plugged into it. Along the way, he managed to destroy the Ethernet controller somehow, but that wasn’t such a great loss as he planned on disabling it anyway. The final winning combination was 40 gauge magnet wire going between the PCB and a thin SATA cable that is mechanically secured to the board with a piece of metal to keep anything from flexing.
At this point, [Jason] has tested enough external devices connected to his hacked-on port to know the modification has promise. But the way he’s gone about it is obviously a bit temperamental, and far too difficult for most people to accomplish on their own anyway. He’s thinking the way forward might be with a custom PCB that could be aligned over the Ethernet controller and soldered into place, though admits such a project is currently above his comfort level. Any readers interested in a collaboration?
Like most of you, we had high hopes for the Atomic Pi when we first heard about it. But since it became clear the board is the product of another company’s liquidation, there’s been some understandable trepidation in the community. Nobody knows for sure what the future looks like for the Atomic Pi, but that’s clearly not stopping hackers from diving in.
For the vast majority of us, Gigabit Ethernet is more than enough for daily tasks. The occasional big network file transfer might drag a little, but it’s rare to fall short of bandwidth when you’re hooked up over Cat 6. [Brian] has a thirst for saturating network links, however, and decided only 10 Gigabit Ethernet would do.
Already being the owner of a Gigabit Ethernet network at home, [Brian] found that he was now regularly able to saturate the links with his existing hardware. With a desire to run intensive virtual machines on his existing NAS without causing bandwidth issues, it was time for an upgrade. Unfortunately, the cost of rewiring the existing home network to Cat 6 and procuring hardware that could run 10 Gigabit Ethernet over copper twisted pair was prohibitively expensive.
It’s a little ungainly, but it does the job.
Instead, [Brian] decided to reduce the scope to connecting just 3 machines. Switches were prohibitively expensive, so each computer was fitted with twin 10 Gigabit interfaces, such that it could talk to the two other computers. Rather than rely on twisted pair, the interfaces chosen use the SFP+ standard, in which the network cable accepts electrical signals from the interface, and contains a fiber optic transciever.
[Brian] was able to get the 3 computers networked for just $120, with parts sourced from eBay. It’s an approach that doesn’t scale well; larger setups would be much better served by using a switch and a less zany network topology. But for [Brian], it works just fine, and allows his NAS to outperform a 15,000 RPM server hard disk as far as read rates go.
If you’re curious about improving your own network performance, it might pay to look at your cables first – things are not always as they seem.
Coming straight to you from the “Department of Redundant Redundancies” comes this clever hack that turns a Switch into a switch. More specifically, a network switch. Not even a half bad one either, judging by the speed tests [Cynthia Revström] performed after setting it all up. We wouldn’t advise you dump your existing network gear in favor of a repurposed game system, but perhaps in a pinch…
Despite what you might be thinking, there’s no hardware modifications at work here. This is a fully functional Nintendo Switch that’s just had two USB to Ethernet adapters plugged into it. The secret ingredient is the addition of some Penguin Power, up and running on Nintendo’s latest and greatest thanks to a project called switchroot.
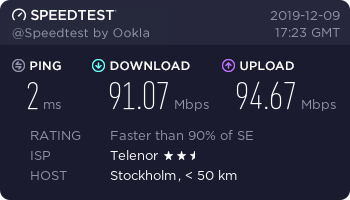
With Linux running on the system, all [Cynthia] had to do was make sure that the USB to Ethernet adapters were supported, and fiddle around with the brctl and ip commands to configure a bridge between the interfaces to get the packets moving. Putting the Switch between the main network and a test computer showed it had a throughput of just over 90 Mbps, which is about all that could be expected from the USB-connected network interfaces.
From here it wouldn’t have taken much more effort to get the system working as a wireless router and providing services like DHCP and NAT to clients. But since Nintendo didn’t see fit to call it the Router, that would’ve offered minimal meme value. There’s always next generation.